Steps for varnishing a print on canvas with a simple method
Steps for varnishing a print are keys to making prints on canvas last longer and look better. If you want to varnish a print, knowing the steps is important. It not only keeps your artwork safe from dust, dirt, and UV rays but also makes colors pop and adds a professional touch. We’ll show you how to pick the best varnish, what materials you need, and how to apply it perfectly. With this info, your artwork will stay beautiful and strong for many years.
Key Takeaways
- Varnishing adds protection and enhances the colors of your canvas prints.
- Understanding the types of varnish helps you choose the best varnish for printing your artwork.
- Proper preparation of the canvas is essential for effective varnishing.
- Follow a step-by-step approach for applying varnish to achieve the best results.
- Timing is critical; know when to varnish for optimal protection.
- Varnishing can be a simple DIY task with the right materials and techniques.
Understanding the Importance of Varnishing Your Print
Varnishing your print is key to keeping it looking great and lasting longer. It adds a protective layer that makes colors pop and shields against damage. This step not only boosts the artwork’s look but also helps it last longer. A print on canvas is relatively fragile as it is, and gets scratched easily; trust me, I know from experience.
What is Varnishing?
Varnishing means applying a clear coat over your artwork. You can choose from gloss, satin, or matte finishes. The type of varnish you pick affects how it looks and how well it holds up. It’s important to match the varnish to your artwork’s materials for the best results.
For most users, I recommend using a glossy varnish, that goes with most photos. I employ as well a mix of matte and glossy, but that would be mostly for photos. That is a debate for another time.

Advantages of Varnishing Artwork
Varnishing offers many benefits. It keeps prints from fading by blocking UV rays. But let’s be clear, it does not offer a full protection. It is not like you apply a coat of varnish, and you can get your print outdoor, without colors passing for years to come. Anybody who tells you that is bullshiting you.
The UV varnish protection shields, I think, 65% of sun rays, which is enough to protect your print indoors, if it is exposed to sun regularly few hours a day. But that is it. Discoloration will infallibly occur over time if it is exposed for long periods. We are using genuine Epson inks that are guaranteed for 200 years, so they offer a better resistance, but still, that’s that.
If you buy your prints at a cheap print shop, using cheap inks, no amount of varnish will be able to protect it.
It also protects against dust, dirt, and moisture. This keeps your artwork looking sharp and vibrant, especially in galleries or your home.
When to Varnish a Print
Timing is everything when varnishing a print. Wait until the print is fully dry before applying varnish. This ensures all ink is dry. The right time to varnish depends on the print’s material and the environment. Paying attention to these factors helps your prints look their best.
My timing at Sky Art Print: I wait for 24 hours before varnishing, so the inks have time to evaporate properly. After that, I apply 2 coats of varnish, within 60 minutes. Then, you still have to wait at least 3 to 5 hours before rolling for shipping, or mounting on stretchers. BUT, I usually give it 24 hours as well if the customer is not rushing.
How to Varnish a Print
Varnishing a print makes it look better and last longer. It’s important to know how to varnish right for a professional finish. This guide covers the key steps, from getting the right materials to applying varnish.
First of all, check this video I made at Sky Art Print. It shows you how to do, in under 2 minutes.
Gathering the Right Materials
First, you need to get the right stuff for varnishing. Here’s what you’ll need:
- Types of Varnish: Pick from gloss, satin, or matte finishes. They change how the print looks. There are only 3 brands of varnish that you can use for the best result. Hahnemühle, Glamour 2, and the varnish from Permajet. I usually use Permajet varnish, they’re known for quality and lasting well.
- Brushes: Use top-notch synthetic brushes for smooth application.
- Foam roll: To evenly apply the varnish in a thin coat.
- Protective Gear: no need, the varnish we use are odor free, and completely safe.
Preparing the Canvas for Varnishing
Getting the canvas ready is crucial for great results, before taking any steps for varnishing a print. Clean it first to get rid of dust or dirt. Make sure it’s dry and free of anything that could mess with the varnish sticking. Work in a clean space to avoid dust. Good lighting helps you see the print’s quality before varnishing.
Applying the Varnish: Steps To Varnishing A Print Guide
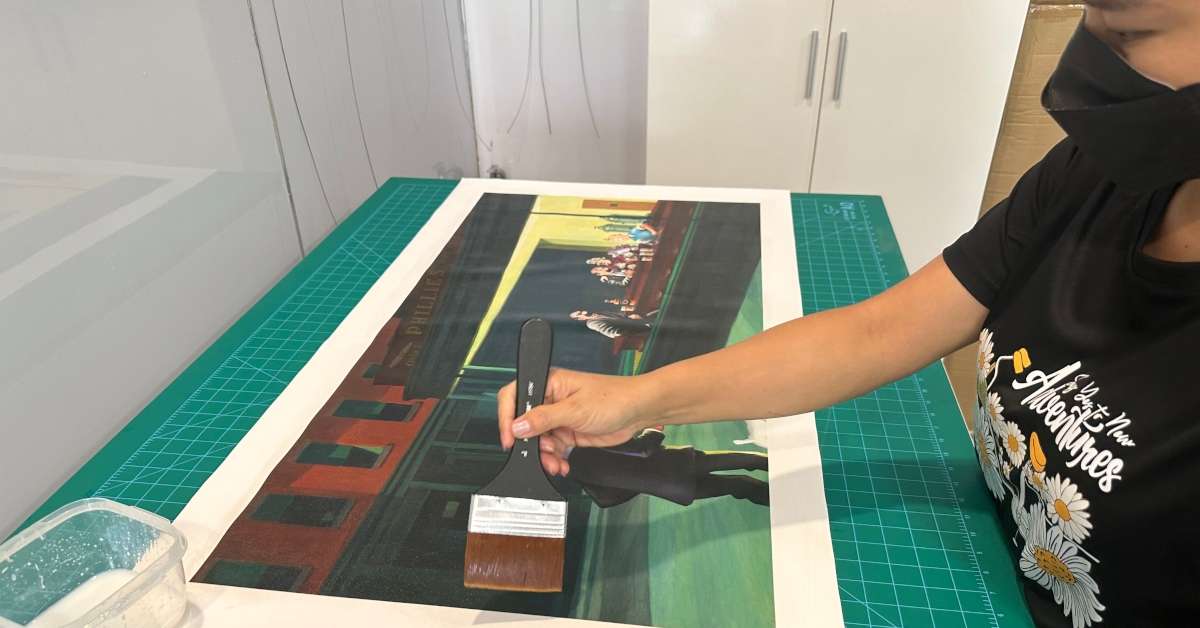
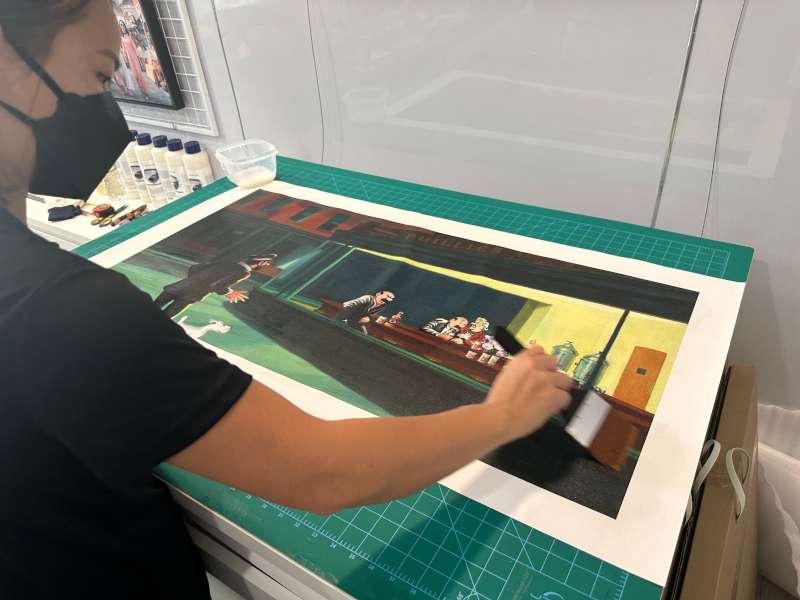
I am using a mix of brush and roll. Brushing helps to spread the varnish quickly before it dries, and rolling allows thinning the coat evenly. Here’s how to do:
- Brushing: Use a synthetic brush for thin, even coats. Pour some varnish in the middle, with the experience, you will know how much is needed, it is not an exact science. Then spread to reach each corner. After that, evenly apply to make sure the whole surface is covered.
- Rolling: For big prints, a foam roller gives a smooth coat without bubbles. Just roll over the already spread varnish, first horizontally, then vertically. One or two times if needed, it doesn’t matter: what is important is that you can see an evenly mirrored effect on the surface.
After varnishing, let it dry and cure as the maker says. This time can change based on the varnish type. Clean up well to keep safe and make your stuff last longer.
Conclusion
Learning to varnish a print is a skill that makes your artwork last longer and look better. The varnishing process protects your prints from dust, UV light, and other damage. This way, your canvas prints stay vibrant and appealing for years.
Following the steps for varnishing a print is more than just a nice touch; it’s essential for your prints’ care. By varnishing your prints, you ensure they look great and stay protected. This guide helps you do it well, giving you confidence in your work.
Now, you have the knowledge and tips to varnish your prints. Take on this challenge, enjoy the process, and make your canvas prints last with effective varnishing techniques.
FAQ
What is the best varnish for printing on canvas?
The best varnish for canvas is Permajet varnish. Their varnishes dry fast and are easy to use, protect against UV and make colors pop. Hahnemühle and Glamour 2 are two brands I used in the past, with wonderful results as well. Warning: do not use a varnish for paint to varnish your prints. Inks are not paint, they are fragile and thin, and a paint varnish will either destroy them or become yellowish over time.
What are the steps for varnishing a print?
To varnish a print, first get the right materials. Make sure your canvas is clean and dry. Then, apply the varnish by brushing, then rolling. You can apply up to two coats, but but always wait for each coat to dry fully.
How long should I wait before varnishing a print?
Wait 24 hours, but no more than 72 hours after printing to varnish. But, humidity and temperature can change drying times. Always check your print before varnishing.
What are the advantages of varnishing artwork?
Varnishing protects your artwork from UV rays, moisture, and dirt. It keeps colors bright and prevents fading. It also makes your artwork look richer and more vibrant.
Can I use spray varnish for prints?
Yes, spray varnish is great for prints because it covers evenly and is simple to apply. Just make sure to use it in a well-ventilated area and follow the instructions. This method is used for small prints on canvas, or if you have just the few prints.
How do I prepare my canvas before varnishing?
Before varnishing, clean your canvas to remove dust and dirt. Make sure it’s dry. Working in a dust-free area helps prevent contaminants from sticking to the varnish.
