Expert canvas stretching tips – How to stretch canvas
Canvas Stretching Basics
When it comes to displaying canvas artwork, mastering the art of mounting canvas on stretcher bars is essential for achieving a professional and polished look. Whether you’re a seasoned artist or a DIY enthusiast, learning the fundamental steps of how to stretch canvas is crucial. This process involves carefully securing the printed art onto stretcher bars to create a taut and visually appealing display. By understanding the basics of mounting and stretching, and using traditional canvas stretching methods, you can confidently showcase your artwork with a professional finish.
Selecting Materials
Canvas and Stretcher Bars
When selecting materials for mounting canvas on stretcher bars, it’s crucial to choose the right canvas material and stretcher bars to ensure a successful stretching process.
Choosing the Right Canvas Material:
At Sky Art Print, we use a 100% cotton matte textile at 380 GSM (gram per square meter). A perfect fit for printing artworks, and easy to mount, even if you do it at home.
But if you do not buy it from Poppins’ Shop, electing the appropriate canvas material is essential for achieving the desired look for your artwork. Consider factors such as the weave, weight, and texture of the canvas. A finer weave is suitable for detailed work, while a heavier canvas provides more support for larger pieces. Additionally, the texture of the canvas can add depth and character to your artwork.
Selecting the Appropriate Stretcher Bars:
Stretcher bars come in various depths and profiles, so it’s important to choose ones that complement your artwork. The depth of the stretcher bars determines how far the canvas will stand away from the wall when displayed. Additionally, consider whether you prefer traditional wooden stretcher bars or modern aluminum ones based on your aesthetic preferences.
You can easily find a bars’ provider near your home, or order on any website in your country for cheaper deals.
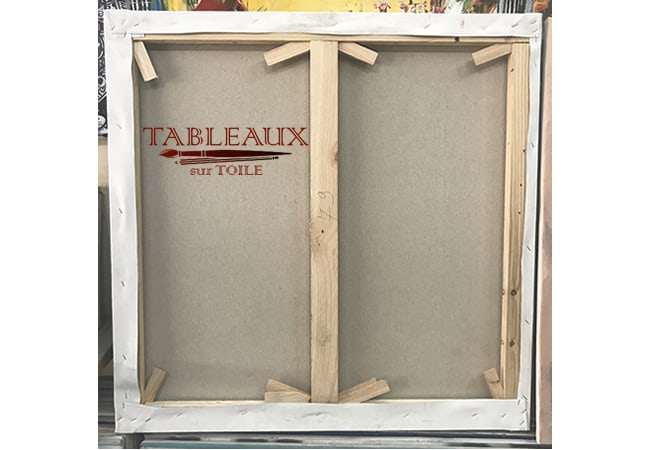
Stretcher bar mounting
Stretcher bar mounting is pretty simple. In the most common cases, you will receive 4 bars. Just fit them into each other, and you are done.
- Simple stretcher bars (without keys), can be maintained with a staple on each corner, behind the structure. But mostly, it is the canvas that will keep it together.
- If you have keys, just mount the bar first, then add 2 keys per corner. After that, you just tense the artwork as described below, without any staple, as you need to keep adjustable. In time, when the cotton loosens a bit, you can just adjust the tension by tapping the wooden keys with a hammer.
Here is a simple video showing you how to do. Not mine, but who cares? I’ll make one later.
Additional Tools
Identifying and understanding the role of each tool required for stretching canvas is essential for a smooth and efficient mounting process.
How to stretch canvas with the right tools
Our expert canvas stretching tips would be to get the right tools before starting. But as we will see, it is not absolutely necessary. Common tools include a staple gun or upholstery nails, canvas pliers, screws or keys (for adjusting tension), a utility knife, and a tape measure. Each tool plays a specific role in ensuring that the canvas is stretched evenly and securely onto the stretcher bars.
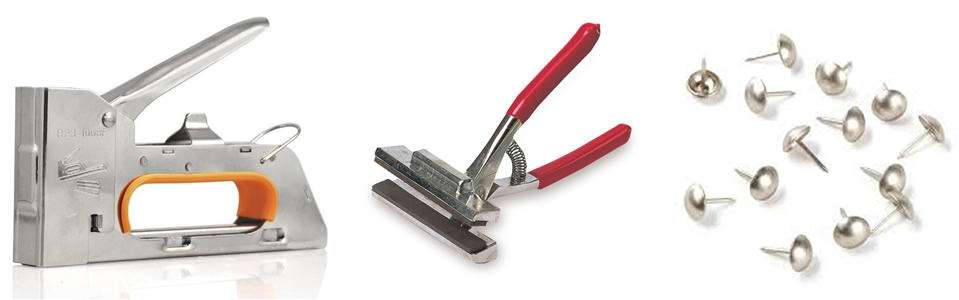
Understanding these tools’ functions will help you execute each step with precision while maintaining control over tension and alignment during the stretching process.
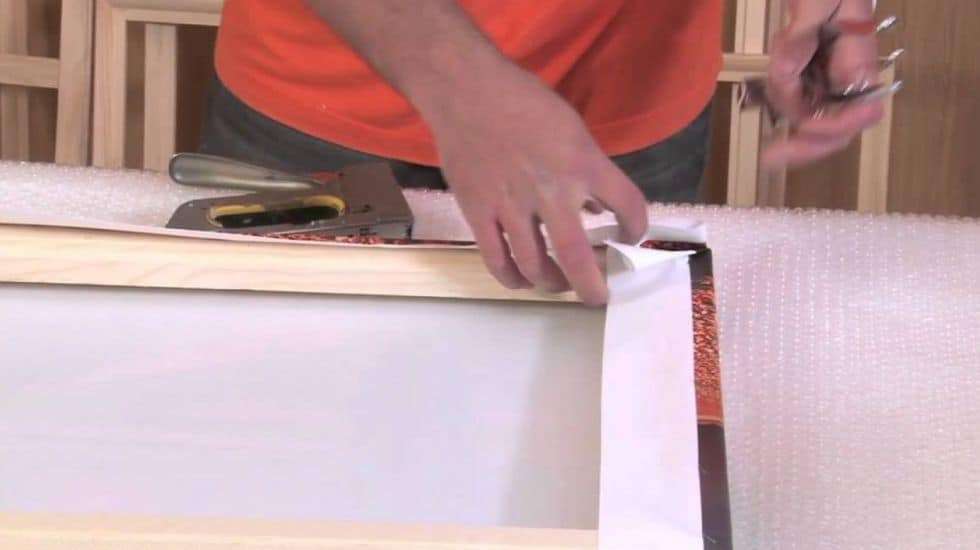
Expert canvas stretching tips without equipment
Ok, not entirely without. You will still need a stapler, but you can do without the pliers. For most canvases, tensing only with your arm strength will be enough.
Basically, you just need the stretchers, the canvas you bought at Sky Art Prints and a stapler. Check me doing it here:
[envira-gallery id=”45236″]
Traditional canvas stretching methods
Preparation
Before beginning the stretching process, ensure that you have a clean and spacious area to work in. Lay the canvas face down on a flat surface, making sure there are no wrinkles or creases. This step is crucial as it sets the foundation for a smooth and even stretching process. A clean table will do, just add a table-clothe on it, or a blanket, to make sure you will not scratch it.
Once the canvas is positioned, place the stretcher bars on each edge of the canvas, aligning them carefully to prepare for mounting. Take your time to ensure that the bars are evenly positioned to achieve a balanced stretch across the canvas.
Securing the Canvas
Expert canvas stretching tips: The trick is to observe a particular order to staple the sides. Check the figure below, and follow the steps from 1 to 12, to achieve a perfect tension. (drawing courtesy to Paul Oeuvre Art)
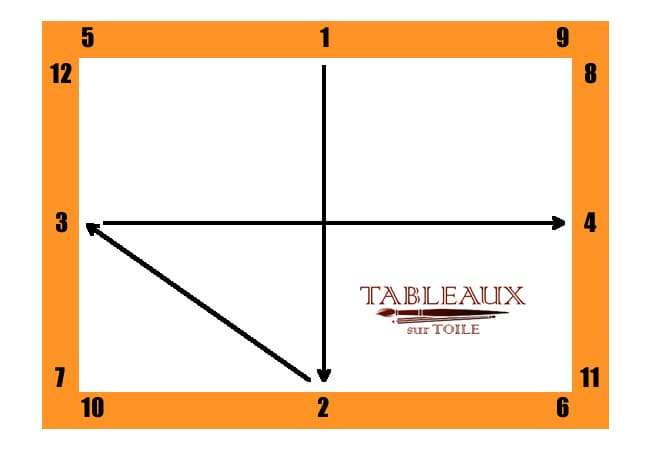
So, once you have achieved a tight fold, use a staple gun to secure the canvas in place. Start by stapling at the center of each side (1 to 4) and then work your way towards the corners, alternating sides to maintain even tension across the canvas.
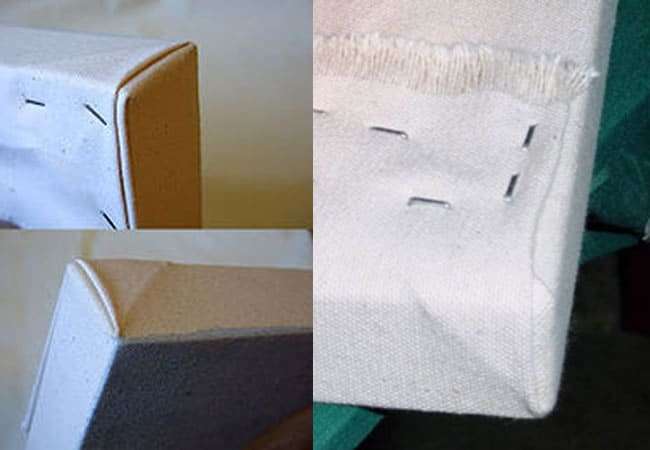
Folding the corners behind the artwork
There are different styles, but the simpler would be to fold the corner alongside the edges of the bars. Once folded, it will remain invisible, anyway. I suggest cutting the artwork’s edges exactly at the size needed to fold properly, but no more.
How to stretch canvas demonstration video
Expert canvas stretching tips – Display Tips
How to extend a canvas to achieve a Taut Finish
When aiming for a professional and taut finish for your canvas display, attention to detail is crucial. To achieve this, consider the following tips:
Regularly check the tension of the canvas by lightly tapping on it. If it produces a drum-like sound, the canvas is appropriately stretched. If not, additional tightening may be required. You can use pliers to make sure the tension is optimal, but doing it manually is possible too.
Utilize canvas keys or adjustable screws to fine-tune the tension if needed. These tools allow you to make minor adjustments to ensure an even and taut surface across the entire canvas.
When stretching the canvas, work methodically from the center towards the edges. This approach helps distribute tension evenly and minimizes the risk of creating wrinkles or uneven areas.
By implementing these tips, you can ensure that your mounted canvas maintains a smooth and wrinkle-free appearance, providing a professional finish for your artwork.
Preserving Your Artwork
How to stretch canvas is not all, preserving and maintaining the quality of your mounted canvas is essential for its longevity and visual impact. Consider the following tips:
Keep your canvas prints away from direct sunlight and high humidity to prevent fading or discoloration over time. At Sky Art Print, we add an extra layer of UV varnish to protect your canvas from the sun and scratches.
Regularly dust your canvas using a soft brush or microfiber cloth to remove any accumulated dirt or debris. Avoid using harsh cleaning agents that could damage the surface of the artwork.
When displaying your canvas prints, choose locations that are free from extreme temperature fluctuations to prevent warping or distortion of the canvas over time.
By following these preservation tips, you can ensure that your mounted canvases retain their original vibrancy and impact for years to come.
Mastering Canvas Mounting
Mastering the art of mounting canvas on stretcher bars is a valuable skill for artists and DIY enthusiasts alike. By understanding the fundamentals of canvas stretching, you can achieve professional displays with ease. Remember to select the right materials, including the appropriate canvas material and stretcher bars, to ensure a successful mounting process. Additionally, pay attention to the preparation and securing steps, as they are crucial for achieving a taut and visually appealing finish. By following these guidelines, you can confidently master the art of mounting canvas for professional displays.